EBIFour.com Training Clarify QRGs How-to Set-up Clarify Auditor Filters and Groups
How-to Set-up Clarify Auditor Filters and Groups
24th December 2019
With the steps below, we will show Clarify users how to customize the Cleo Clarify Auditor with Filters and Groups.
Goto Clarify Auditor

From the Admin Console, goto the Auditor tab
Create Log Filter Group
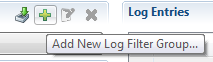
Once in the Auditor, create the Log Filter Group. Users can do this by clicking on the Add New Log Filter Group icon near the top.
Name New Filter Group
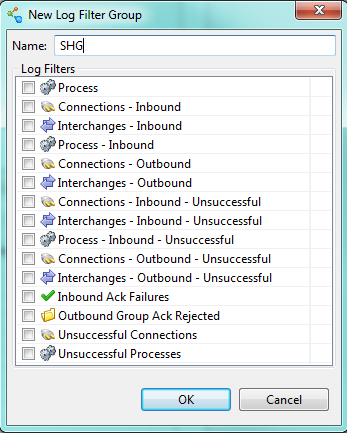
Users can now name their group. In this example we named the group SHG.
Creating Log Filter 1
After, the Log Filter Group is created, the Cleo Clarify user will want to do is add a Log Filter to their Log Group.
We will be adding an Inbound 850 BPS Log Filter to the Log Filter Group.
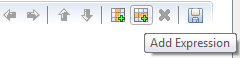
We will select the Add Expression icon since there already is a Group started.

Testing Log Filter 1
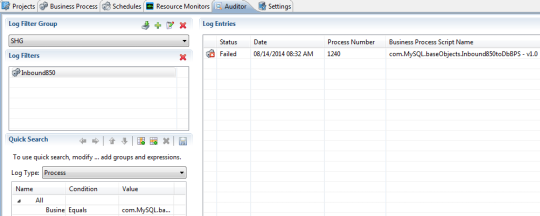
the Clarify user can select their Log Filter Group. The group and it will show the Inbound
850 BPS processes in the Log Entries.
Creating Log Filter 2
Another Log Filter we can create could be for a specific Trading Partner
On the Log Type dropdown
select Route.
Next select Add Expression. Here we will search on where the
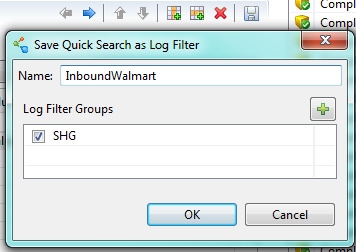
Sender ID contains Walmart.
Select the Save Quick Search as Log Filter icon.
Testing Log Filter 2
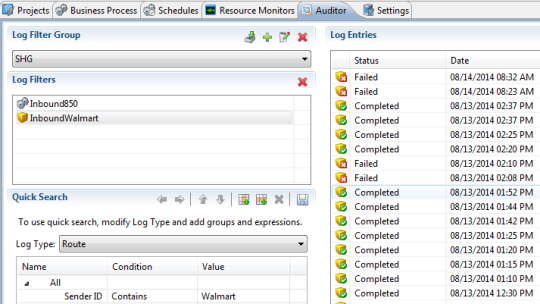
At this point, the Clarify user can select their Log Filter. The filter will show only Inbound Walmart processes in the Log Entries.
By: Sean Hoppe on