EBIFour.com Training Clarify QRGs Creating Database Monitors
Creating Database Monitors
31st January 2020
Background
Sometimes Cleo Clarify users want to process database data as soon as it populates in a table or there is a change in a field. By implementing Cleo Clarify Database Monitors, users have the ability to implement this functionality.
Setup – Create Event
In Cleo Clarify create an Event.
With the Clarify Event, we will attach it to the Database Monitor and call the correct Outbound Launcher Business Process (below).

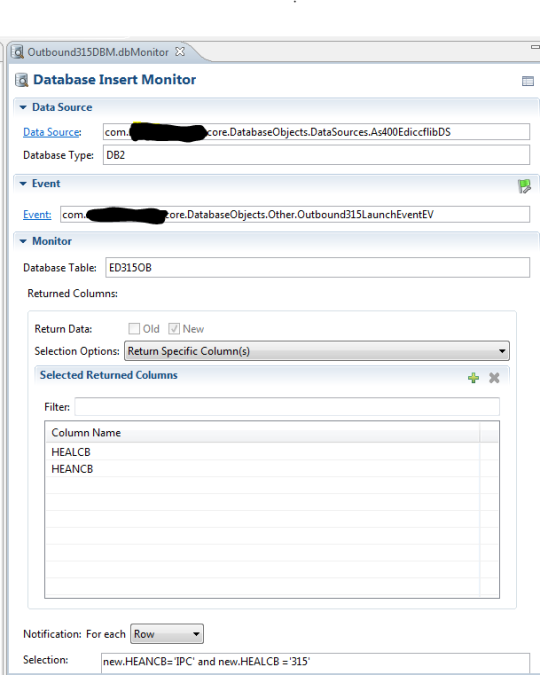
Setup – Create Database Monitor
Once the Clarify event is created, we will create the Clarify Database Monitor (below).
In our example/scenario, we are monitoring a trigger file. The trigger file is populated, by a back-end process, when all the necessary data is present in the related tables.
Some values will need to be filled in here for the correct triggers.
Creation of Database Monitor
1. Identify the Database Data Source
2. Attach recently created Clarify Event.
3. Determine database Table the monitor will watch.
4. This example is triggering on the creation of when new records are created where HEANCB = IPC and HEALCB = 315
5. Select the columns to return.
6. Populate SQL statement – HEANCB = IPC and HEALCB = 315
Setup – Deploy Objects to Server
Once the Clarify Event and Clarify Database Monitor are created, we want to deploy the objects to the Cleo Clarify Server.
After the deployment is performed, select the Resource Monitors tab in the Admin Console and start the Database Monitor (below).

Final Result
Now, whenever a new record with the specified criteria populates this database table. The Outbound Launch Business Process will launch automatically.
By: Sean Hoppe on